
Watch the video or follow this step-by-step guide to create an Air Conditioning (Activity 6 Space Heating) installation job under the Victorian Energy Upgrades (VEU) scheme in Alitsy. This includes how to manage multi-head installations.
Step 1: Set Up Scheme & Details
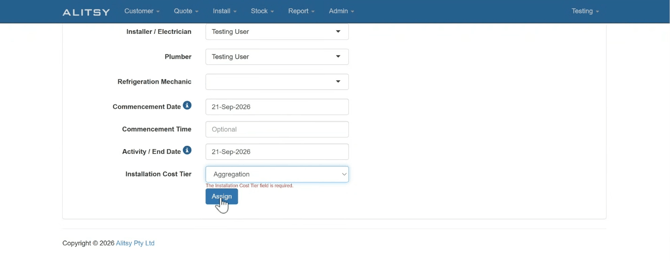
- Create a new quick installation record and select VEU SH (VEU Space Heating) as the Scheme.
- Select your assigned Electrician and/or Plumber.
- Enter the Commencement Date.
- Set the Aggregation option (such as installation cost).
Step 2: Add Outdoor Unit & Area Sizing
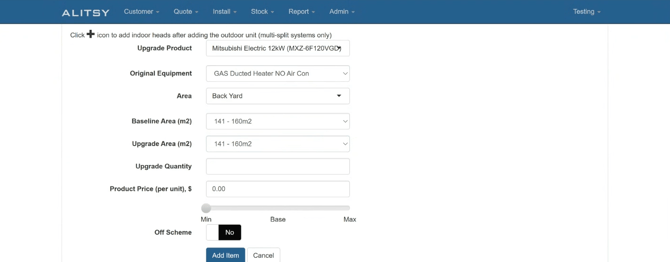
- Once the installation is created, scroll down to the middle of the page.
- Click Add New Product to begin.
- Under Upgrade Product, enter and select the outdoor unit model you are installing.
- Select the type of system you are replacing.
- Select the Area where the outdoor unit will be located.
- Under Baseline Area, select the floor space area (m2) that the existing heating covered.
- Under Upgrade Area, select the floor space area (m2) that the new product will heat.
- Set the Upgrade Quantity for the outdoor units being installed.
Step 3: Add Indoor Heads (Multi-Head Split Systems)
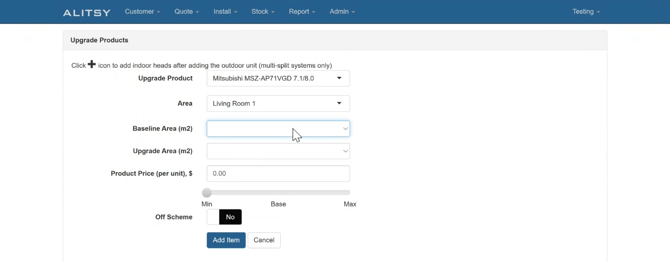
Note: If installing a multi-head split system, you must add both the outdoor unit and each individual indoor head.
- Click the + button next to the outdoor unit to add an indoor head.
- Select the Area where the indoor unit is located.
- Enter the Baseline Area (space covered by the old system) and Upgrade Area (space covered by the new system) for this specific head.
- If the total coverage area does not match the recommended sizing guide, enter a valid Reason in the provided field.
- Repeat this process until all indoor heads have been added to match your physical installation.
Step 4: Complete Signatures & Compliance
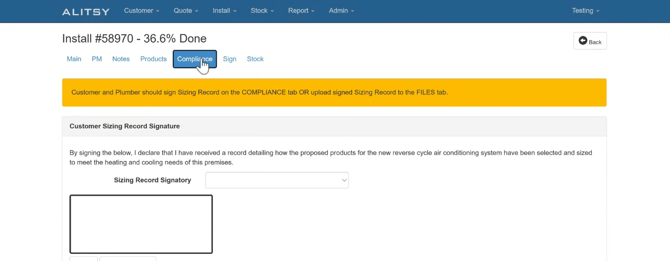
- Navigate to the Compliance tab.
- Select the Authorised Signatory.
- Send the signature request to the customer via Email, or have them sign directly on-site using the mobile app.
- Ensure the Plumber Sizing Record is signed.
Note: All entered sizing and coverage data will automatically populate onto the official sizing record generated within the system. Ensure all required documentation is signed prior to submitting the job for auditing.